On a video and photography shoot we just did our photographer got loads of support from the social media manager, who had a background in photography and knew what he was after. Natalia Quinteros ran around setting up shots, helping with lighting and getting people where they needed to be, which really came through in the output. We discovered that she had written guidelines on clinical photography for staff at The Bristol Dental Practice too and thought our readers might want to see them. So Natalia sent us this.
Since I can remember I have always had an eye for seeing things around me differently and I always wanted to capture those moments, to look back on as I grew older. When I had the opportunity to study photography in college and it was mandatory that you had to have a proper DSLR camera, that’s where it all really began for me.
I became obsessed with photographing every aspect around me, zooming really close to capture the smallest details, to photographing the environment around me in a landscape format. From there I began to not only experiment in digital photography but I found my respect and love for film photography. We had a dark room at college and I would spend hours experimenting with different techniques.
I never heard of clinical photography until I began to work at The Bristol Dental Practice. I guess that was because I had always gone to NHS dentists. I remember the first week of starting at my new job and one of the dentists had this awesome looking flash mount attached to his camera that I had never seen before. Immediately I needed to know everything about this awesome looking equipment.
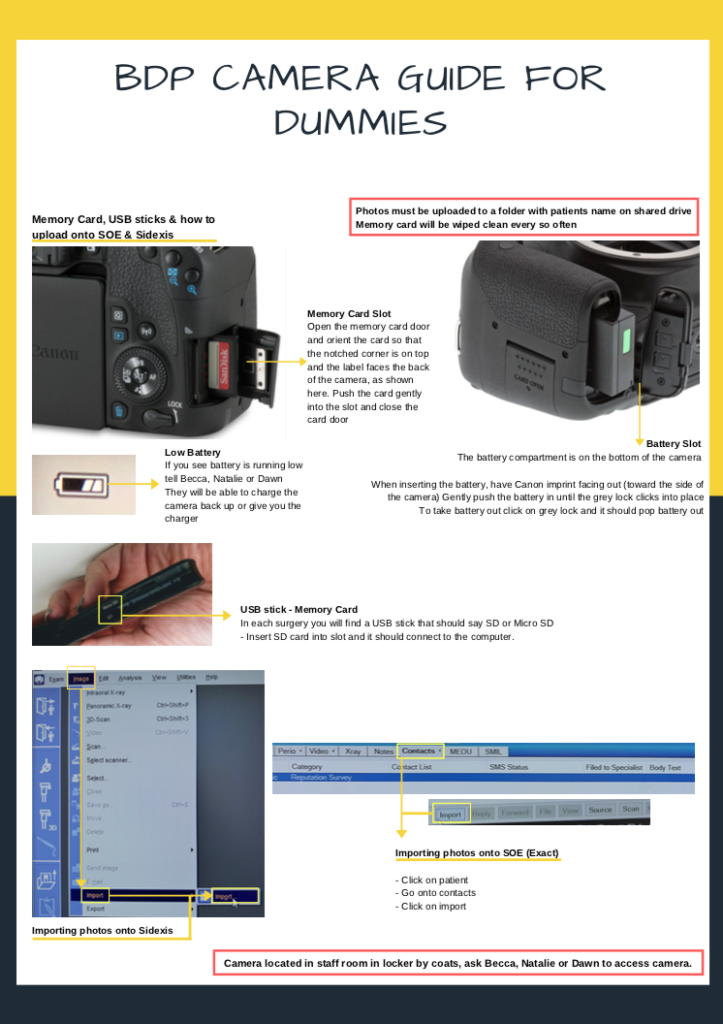
So that’s where my research into clinical photography began. Finding the right camera, having the right lenses and props to get the best results that would help out not only our clinical team but for our patients to see the results of their treatment, before and after.
Here are my results so far for the equipment that we have. I’m not saying these settings will achieve the same look as our set up does for us, but it may help you understand how to set up your equipment to best suit your needs and desires.
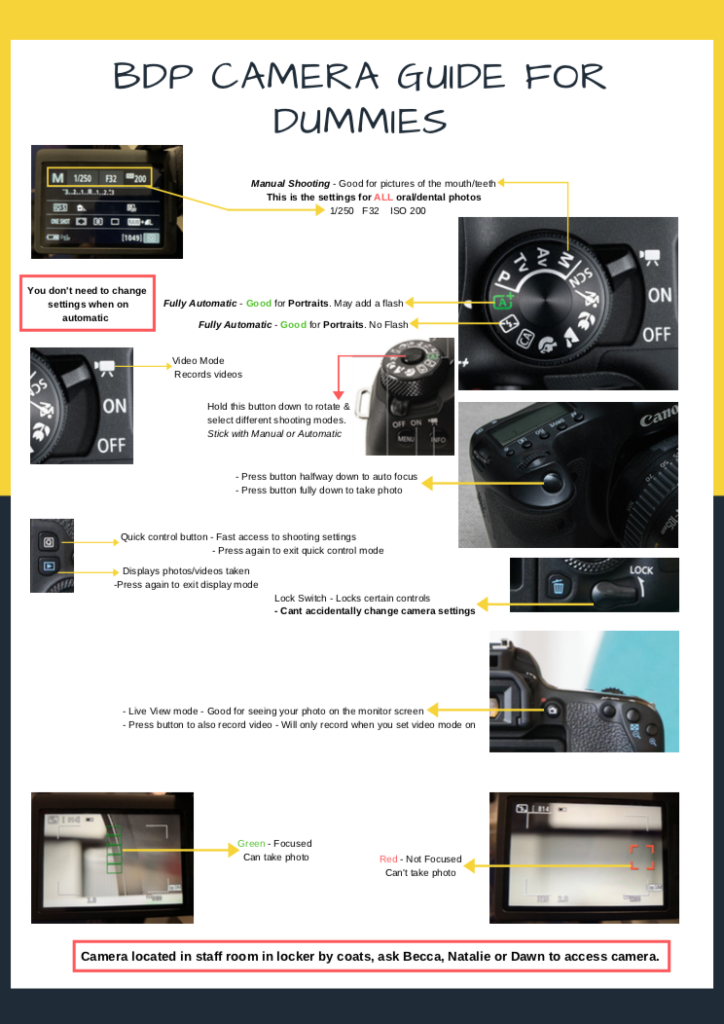
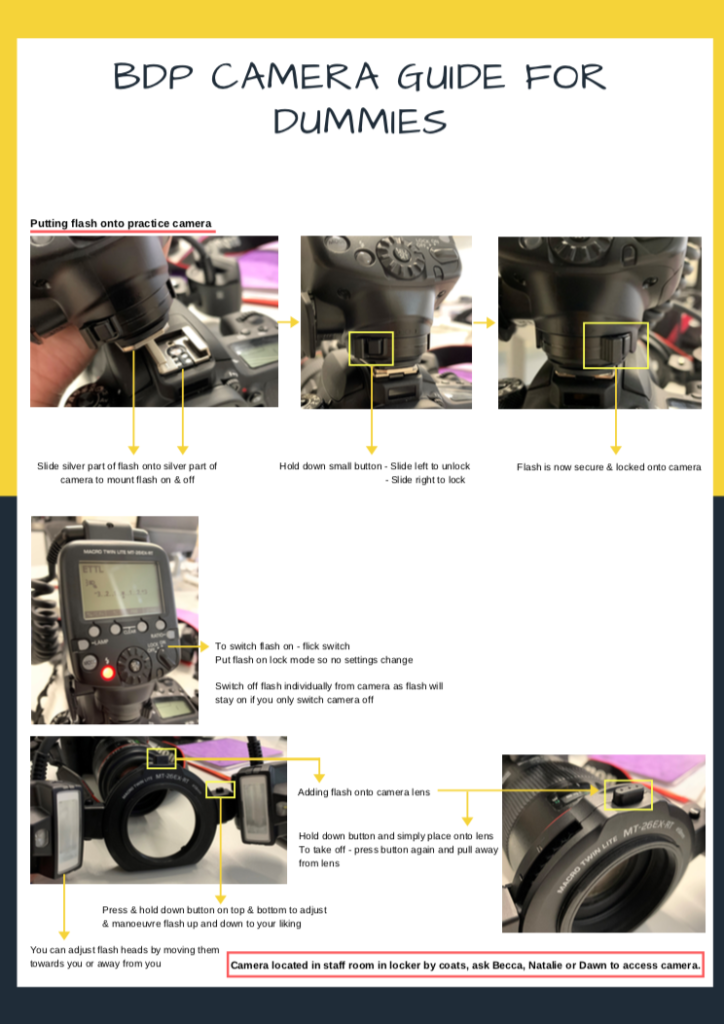
We use a Canon 77D with an 100mm lens
Mouth shots
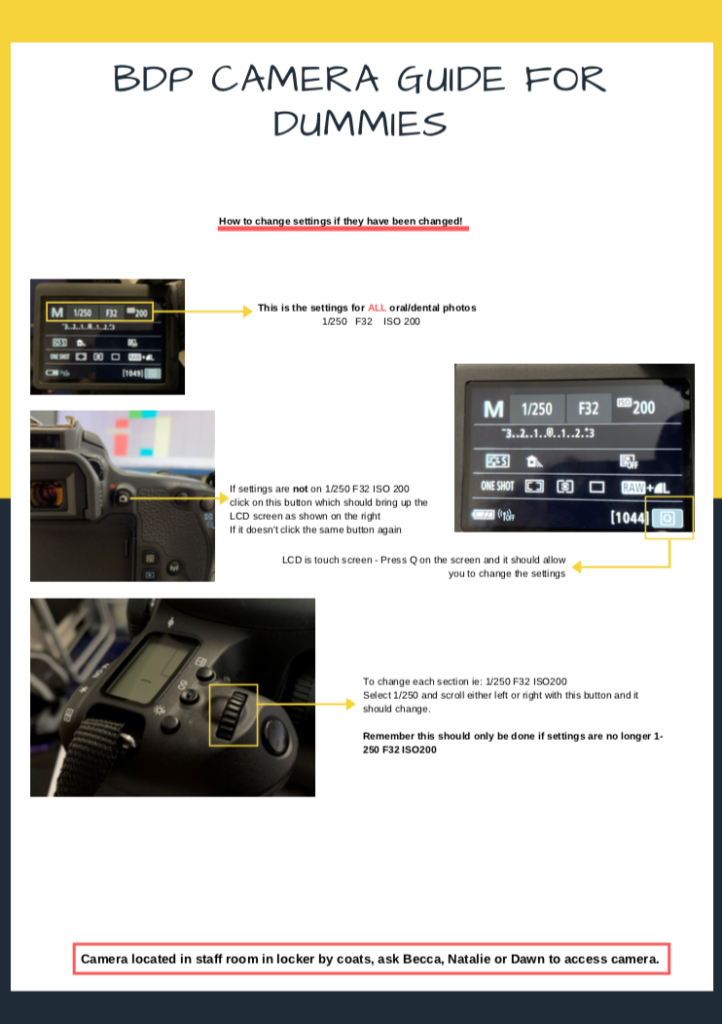
I found that using Manual shooting achieved the best results for crisp, clear images of the mouth using a 100mm lens with a Flash Macro Twin Lite. Settings are as follows, 1/250 F32 ISO 200, these gave us the perfect focused shot inside the mouth of our patients. We tested this out multiple times with different staff members to make sure it worked each time.
Portraits
Use the fully automatic option on the camera to achieve quick and perfectly focused shots. There are two different fully automatic settings on your camera, one with flash included and one without —try both and see which gets the best result. Going fully automatic means that you don’t need to change any setting, just point and shoot towards your patient.
Here are the guidelines that Natalia gave to The Bristol Dental Practice clinicians — they go onto more detail on camera controls, focusing, flash, and file management (download as a pdf here). Thanks Natalia.